WORKSHOP
This workshop is for personal use only.
Resources:
Drill with eventually a flexible axle
Round Timber with a diameter of 6mm (these diameter is the perfect size to practise), which must be longer than the width of the vice
A cutter for example the Proxxon nr: NO 28710
A vice
A square
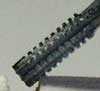
On the right you see a enlarged picture of the cutter.
This cutter works easily and is a perfect tool because it needs little force to use it in a proper way.
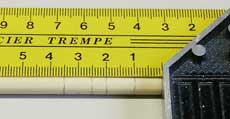
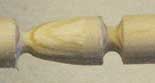
The marking of the cutting groves.
Put markers AROUND the timber in the same way as you see on the right. The dashes are very important. They are the only guidance to ensure the grooves are cut on the right places.
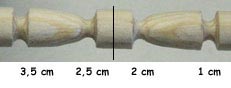
Find the middle of your cutting model. This is important, because it determines the side from which later on the cutting must be done. On the right side the cutting must be done from the left and on the left side the cutting must be done from the right.
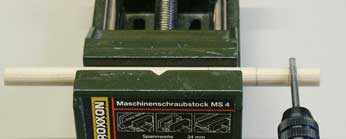
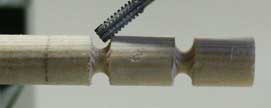
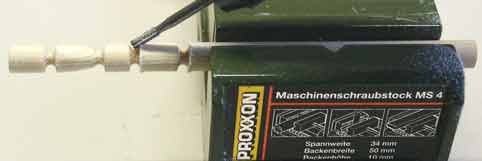
The placing of the round timber and the cutter.
Place the round timber inside the workbench or place it on the top of it. Make sure the timber still can turn. So don't fasten the timber inside the vice.
The cutter is placed perfectly square on the timber.
Now we are first going to try how much pressure must be put onto the cutter. Take a sample timber, adjust the number of revolutions of the drill (for example 9.000 rounds per minut) and let the cutter do his work without imposing on the timber any pressure. When the cutter is trying to 'walk', you must try to overcome this. Increase the pressure on the cutter a little bit, just enough to get a square groove.
Now place a marker on the timber and try to cut exactly next to this marker. Make sure not to cut too much. The marker is the only guidance to secure you are cutting in a straight line.
During the cutting you can try to make sawing moves. By doing this you can work smoother. It also helps to overcome the problem of a too deep cut on a certain place.
The cutting of the groove.
We start to work on the right side of the marker.
Cut grooves around the timber next to the first marker. Don't cut too deep. You can finish this later.
Finishing the roughly cut groove.
Simply turn the timber around during the cutting. Check frequently the depth of the groove to make sure you are not cutting too deep.
It is possible the groove has a oval shape. This can easily be checked by turning the timber.
By inforcing more pressure (cut a little deeper) on certain places it is rather simple to repair this.
Cut the second groove in the same way.
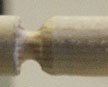
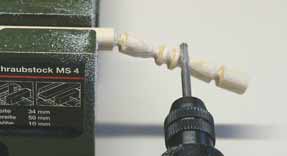
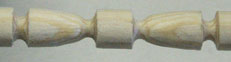
The shaping of the cone (1).
Place the cutter on the timber in the same way as you can see on the right against the edge of the groove.
Cut away carefully the sharp edges until you get somewhat of a round shape.
Be aware of the hook between your cutter and the timber. If this hook is too horizontal, it can generate problems. For example: you will no longer be able to make a good cone.
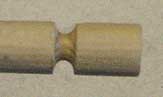
The shaping of the cone (2).
Start scraping carefully from the middle of the cone towards the second groove.
Make sure you do this with extreme care. You must experience how much pressure you must impose on the timber.
Finish the cone for 3/4 and let the remaining 1/4 unshaped. This part can scoured later on.
Now cut all the grooves. Pay attention not to cut on the wrong side of the markers.
To cut the second cone move the timber to the left (other) side of the vice.
If you are satisfied with your cutting work, scoure it and finally your leg is ready.
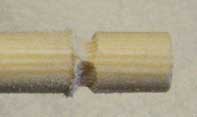
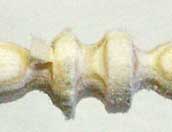
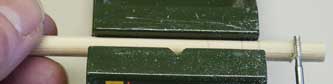
What can go wrong.
I wasn't satisfied with my leg and wanted to cut another groove in the middle between two other grooves. The cutting was no problem, but I couldn't finish it. As you can see on the picture the wood began to splinter on the left side.
In these situations you must work precise and carefully.
If you impose too much pressure the timber can break through.
Exercise makes the master
Try to practise with timbers of different diameters. If you are satisfied with your crafts, then try to make 4 matching legs. A small tip: painting the legs will hide small roughnesses.
Good luck with this workshop.